


How to Make Magic with Tough Ceremony Lighting
Mastering lighting as a wedding photographer is high-key exciting AF. As your work evolves and you’re able to create images you’re super proud of and pumped to deliver to your clients, it’s a fulfilling feeling to say the least.
One of the ways that you can consistently create that feeling for yourself is to be prepared for annoying/difficult lighting situations that will come up for you. Plan in advance for how you’re going to handle non-ideal lighting scenarios throughout the ceremony so that when the day comes you don’t end up with bad lighting and then go into panic mode 😬
The absolute last thing you need while shooting a wedding is panic mode, so let’s talk about some of the most common tough lighting scenarios and the tips I have for you to conquer each of them.
Under a tree with dappled + uneven light
Couples adore getting married under trees. To be honest, I completely understand why. You can get some super stunning images from these types of ceremonies. But more often than not, they come with tricky lighting situations. Here’s a few of my recommendations for navigating those!
You should definitely educate your couples on what this might look like. Literally show them examples and have a conversation with them about timing ideas. Keeping your couples in the loop and setting expectations up front is always a good way to reassure them.
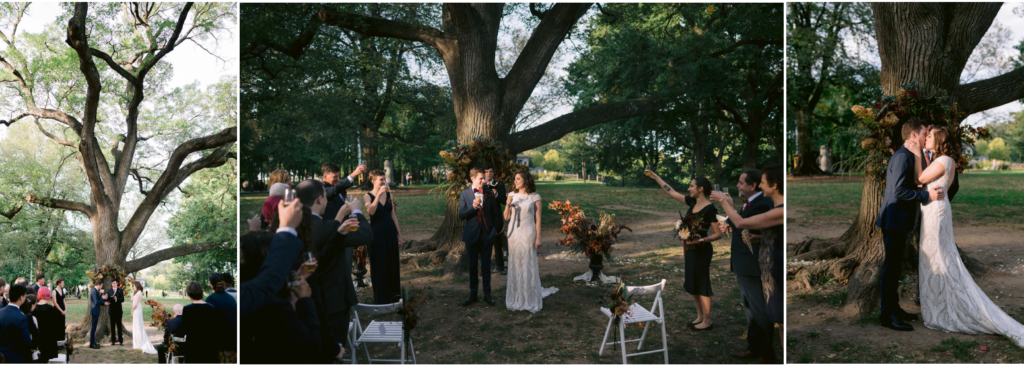
During the ceremony, expose for the brightest area of the scene because it’s always much easier to bring up the shadows than it will be to recover highlights. Also, be prepared with an 85mm zoom lens or above so that you can crop out a lot of that dappled light and bring depth to your photos.
As far as editing goes, learn how to use your brushing tool in Lightroom so you can compensate for harsh shadows and light for the big moments. This is going to make all the difference in the world in some cases, to take some time to learn this if you’re not confident with your skill with this tool yet.
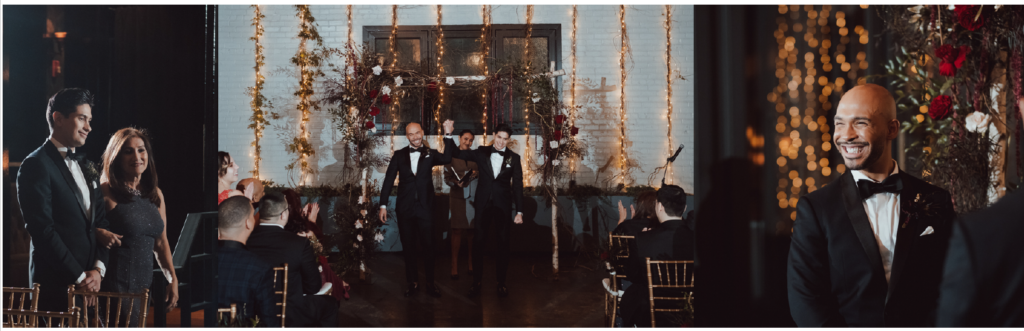
After dark indoors or low light
Wooo, this can be a tricky one, not gonna lie! At the end of the day, what’s going to help you the most in this situation is a solid understanding of your camera’s capabilities. The difference between the photos you end up with when you’re not for sure about what your camera can pull off and the photos you get when you’ve mastered your camera’s capabilities is so beyond worth it.
Can you shoot natural light?
The first question to ask yourself is if there is going to be more than one natural light source. Think candles, windows, stage lighting, overhead lighting, etc. Many digital cameras will struggle to process the tones from multiple light sources indoors in a low-light situation, so do research ahead of time to know what your camera is capable of. No matter the situation, always come prepared with flashes and have at least one by your side.
Have bounce flash and OCF available for the first kiss and the recessional no matter what. Remember that you’re there to capture those moments for your couple – not necessarily to get artsy photos. Worry about getting those important storytelling images first, then worry about the artsy stuff.
Shoot with what works for your style and do your thing, obviously, but don’t let your personal preferences get in the way of getting the shot that the couple wants, even if you can’t quite pull it off the way you’d like to.
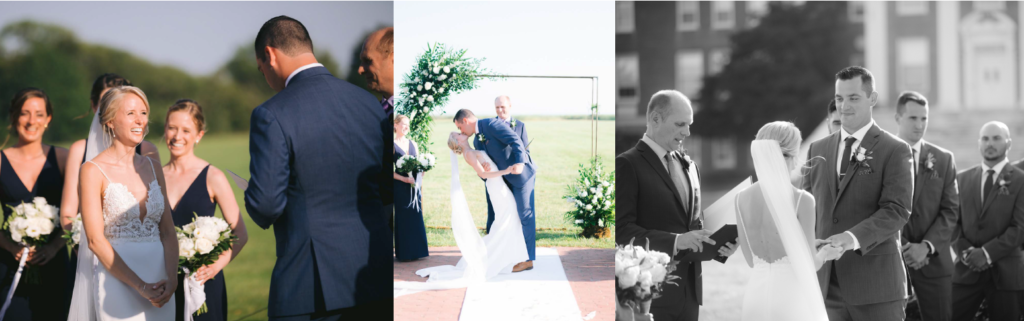
Harsh light coming from one side
Some lighting situations (namely, this one) are tough and inevitable due to layout, setup, and time of day. Unfortunately, there is nothing we can do to change them, so we just have to understand how to work with them.
In this kind of harsh lighting situation, you need to eliminate distracting elements from your images as much as possible so that you can focus on and capture the emotions throughout the ceremony. For that, you need to have an 85mm lens or above in your kit. Here’s an example of a 35mm vs. an 85mm during the same wedding:
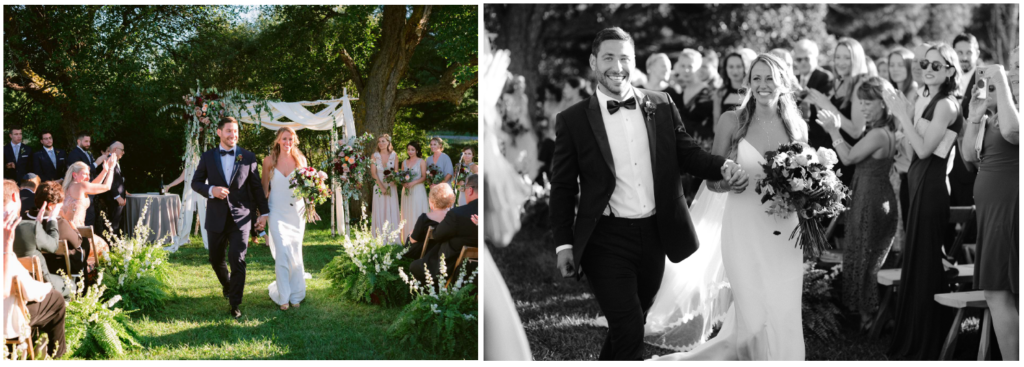
As you can see, the image with the 35 is much flatter and less of it is compressed because it’s wider. There’s also a lot of distracting elements in there that we can’t get rid of (too many subjects are highlighted, etc.) With the 85, there’s so much more depth to the photo and your eye goes directly to the couple vs. getting distracted. It helps bring depth with that flattening harsh light!
My next tip for this type of situation is that you have to move around fast in this scenario because you need to find the best angles and utilize them before you let those moments slip away. A lot of the time, your couple will be dipping in and out of the shadows in this type of scene, too, so pay attention to that and get those photos.
Usually, the best angles in this case are from the side and you’re looking for that soft backlight or harsh direct light for the best results.
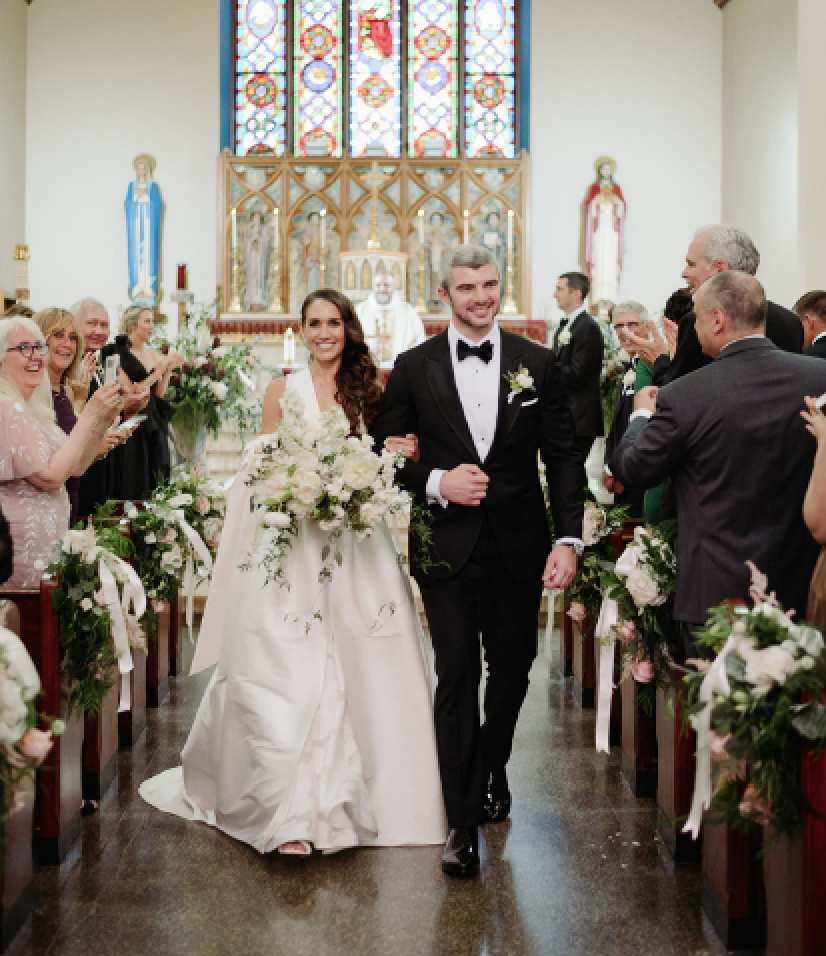
Church with low light and no flash allowed
These are my go-to’s for working with a less than ideal church lighting situation when you’re not allowed to use flash.
One of the benefits of photographing in a church is you usually have time. Use that time to be strategic to find the best angles and figure out where the light is hitting. Then stick there to photograph from those spots!
Church lighting can create tough color situations in the final product, so make sure you know how to remove yellows and oranges from your images. This isn’t just adjusting your white balance, but working with the color profiles and split toning of the images in post-production to keep things looking natural.
Of course, you don’t want to desaturate the image so much that it affects skin — just lose some of that really annoying yellowy lighting we sometimes run into with church ceremonies as wedding photographers!
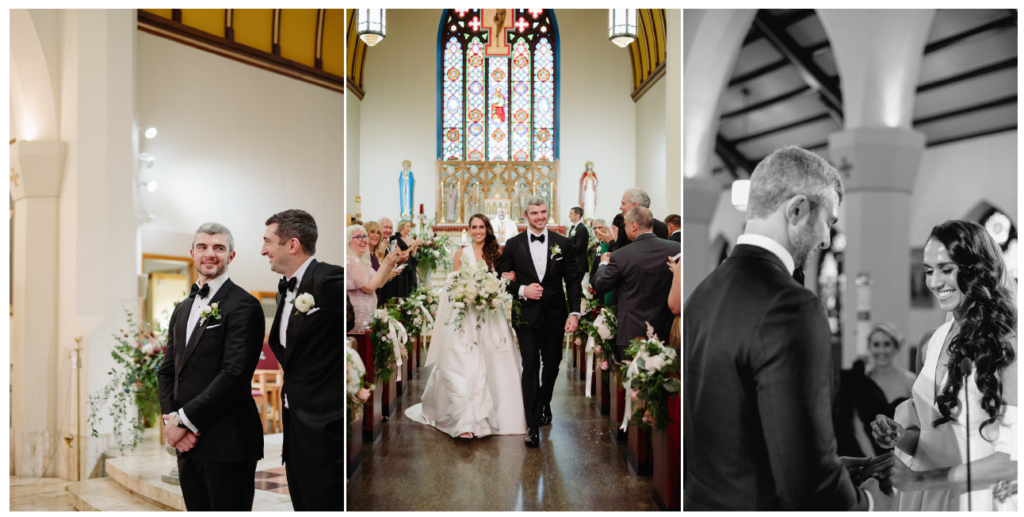
Hot tip: If it’s a rrrreeeallly dark church and you KNOW you need to do something to get that shot… just slap that bounce flash on, get the photo, and apologize later. At the end of the day, you gotta come through for your clients and make sure that you capture that *just married* moment.
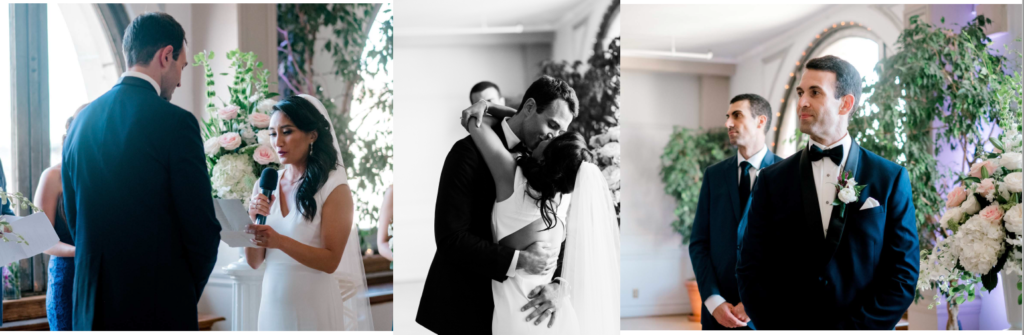
In front of a window or doorway
One of the toughest lighting scenarios! Any wedding photographer will run into this, often at waterfront or industrial paces. Here are a few tips on how to prepare for and handle these tough ceremony light situations.
Always educate your clients upfront about lighting scenarios and how important it is for them to get the Pinterest-esque photos they are envisioning! It’s so important to set expectations so couples understand what you’re working with and that you’ll do your best to get the images they want. Whenever possible, show sample images in advance of the wedding so they know what to expect and see how you capture the space.
When the ceremony will be in front of a window or doorway, bring both off-camera flash and bounce flash. You need to be fully prepared in a situation like this, so familiarize yourself with both if you aren’t already. This is going to allow you to handle everything in this situation like a champ and avoid freaking out over the lighting scenario.
Most of the time, you’ll be shooting from the side for the best results when your couple is getting married in front of a window or doorway because you need to avoid some really bad backlighting. Reminder: backlighting completely diminishes detail in your photos and can overwhelm digital sensors.
Even when they are coming down the aisle, you need to get that shot from a side angle otherwise their just married moment will be overpowered by that not-so-pretty backlight.
If everything is happening after dark, just use off-camera flash. While this situation may feel limiting, you can play around with your OCF. Move your stands around as things are happening to get a variety of different shots. The same setup that you did for the front of the aisle isn’t going to work for the recessional, for example, so prepare yourself by planning out what you’re going to do to get the best images and capture the moments.
At the end of the day, you need to really get to know your camera in order to negate bad lighting scenarios
The thing about annoying lighting scenarios like these is that you HAVE to fully understand your camera’s capabilities in order to get the best images possible. Taking the time to get super comfortable and familiar with what your camera is able to pull off in different scenarios is absolutely 🔑
Here are some important questions to ask yourself:
- How high can you crank your ISO before getting too much noise?
- How low can you have your aperture while still having things in focus?
- How low can you crank down your shutter speed before you get motion blur?
Truly and honestly: If you’ve been procrastinating getting to know your camera on this level then put this back up at the top of your to-do list, because this is exactly what will take your work to the next level.
To dig deeper and master lighting once and for all as a wedding photographer, check out my course Light Source because it’s THE resource you need if you’re struggling with this. It covers everything about how to use light throughout your weddings from basic lighting science, to walking you scene by scene throughout a wedding day, to stuff like exactly what we talked about today.
I’m actually allergic to courses full of fluff and BS, so just know that this one is not any of that. It’s full of concrete examples for how to take your wedding photography to the next level and I share all of my strategies and tips with you that’ll help you to take your images from good to epic.
If you have a question for me about difficult wedding ceremony lighting situations, leave a comment below!


")


Comments +